Tuesday, May 19, 2015
Rain, rain and more rain
So yeah, I know I said I was going to try to work on my DeLorean every day until the show, but it has literally rained every single day since I said that, and is supposed to rain for a few more days yet. *sigh* But don't worry, work will resume as soon as it stops raining. I just hope there are enough dry days to get 6080 back into shape before the show.
Friday, May 15, 2015
Finally getting back to work
Wow, it is amazing how fast life flies by before you even realize it. I have been focusing on school so much that I haven't really touched my DeLorean since I installed the side stripe...what, almost exactly two years ago? Sadly, my poor D had developed a number of problems in protest of my neglect.
The Colorado sun, being as absolutely brutal as it is, caused the new binnacle that I installed when I redid my interior to crack horribly, as well as the passenger knee pad. :'(
The clutch system had been leaking for a while, but it finally went out completely. If I remember correctly, the previous owner had replaced most of the system right before I bought it, including new stainless lines and master cylinder, but didn't get around to replacing the slave cylinder. He included the new one with the car, so I will have to figure out exactly how to replace that and get it done once and for all.
I also never finished installing all of the interior trim pieces after rushing to get to the parade five years ago, so I will get that all finished up as well. (I actually had to stop and think if that was really FIVE YEARS AGO! Like I said, time flies!)
Also, I think I mentioned before that the passenger side door is sticking. I figured that it needed the lock and latch procedure done again, so I pulled the door panels off to mess with the alignment of the rods. I noticed that the rods seemed to be adjusted like they should be, but the door was still sticking really badly. After some investigation, I figured out what the problem is. The door release cable that attaches to the outside door handle sticks every time the handle is pulled, which causes the latch to not fully reset and the locks to jam. I don't know if there is any way to grease that cable to make it start working again, or if I will just have to buy a new one. They are only $20, so I may just end up buying a new one.
A couple of months ago I tried to start 6080 for the first time in two years. I syphoned all of the old gas out, put a few gallons of new gas in, and installed a brand new battery. Very excited to hear it run again, I turned the key and it turned over without any issues! Unfortunately, while I was cranking it I started to hear liquid running out onto the driveway. I immediately stopped cranking it and jumped out to see what the problem was. I could smell it before I could see it: gas. The main fuel line coming off the fuel pump had split and it was spraying gasoline everywhere. Sigh. So I ordered some new fuel line and have it sitting in a box ready to be installed. I was going to try to install it today, but the moment I got out to the car it started raining, and it hasn't really stopped since, so that will have to wait until tomorrow.
So yeah, work is beginning again on my DeLorean, albeit very slowly. Being a student and not having much money right now, things are going to be progressing at a painfully slow pace, but it IS going to happen. I'm not going to let 6080 succumb to the ravages of time and Colorado weather!
What is my motivation to get working again? Well, I just found out that a local 80's themed pizza place is holding a DeLorean/BTTF car show next month! They are inviting all of the local owners to come and show their cars and enjoy free pizza! I really want to go and show 6080 again, and I also really, REALLY want to start driving it again as my daily driver, so I am using that show date as my official goal for being daily driver ready again! It will be a very difficult challenge given my current lack of funds, but I am going to do what I can to make it happen!
I think it's time for a new to-do list! Here are my current projects, roughly in order of most important to least important.
To-Do:
Clutch slave cylinder replacement
Fuel line replacement
Replace ball joints
Passenger door cable repair/replacement
Fix or replace passenger side front tire (keeps going flat)
Emissions test/license
Replace weather stripping
Replace air conditioner system
Install remaining interior panels
Replace window switches
Paint wheels
And anything else I'm forgetting or that may come up as I go along. Really, only about half of that list is required to start driving it again, and I already have quite a few of the parts I need, so I don't think it's completely out of the question to get it daily drivable in the next month. I guess we'll see how far I get! Should be fun!
~Lyndsey
Saturday, May 18, 2013
It's been a while!!
So...it's been over two years since I have posted here. Hmm, so what have I done with 6080 in those two years? Absolutely nothing. :(
Oh wow, I just realized that I didn't post about my near miss! So shortly after my last post here, I was using 6080 as my daily driver. One morning as I was driving home from work, I hit a pothole in the road and heard this HORRIBLE grinding noise! I figured I had blown a tire and was running on the wheel. So I pulled over, and noticed something odd. The wheel was sticking out at an absolutely sickening angle. Upon closer inspection, the castle nut had come off of my ball joint and I had been dragging my brand new stainless lower control arm along the interstate at 75mph! Well, I got towed home, and sometime in the following weeks replaced the castle nut. I drove it to work again, but the alignment was way off, and it made me nervous to drive it. I figured I would get an alignment when I got paid and that should fix everything back to normal. Well, while waiting to get paid my license expired, and then shortly after that I got laid off, so I wasn't able to get it aligned. A couple of weeks later my parent's really needed a battery, and since I had just installed a new one they "borrowed" it from my car "since you can't drive it right now anyway". They promised to replace it once they got paid, but then hit hard times, as did I, and my poor car is still sitting in the same place it was parked two years ago without a battery.
*phew* Anyway, glad everyone is caught up. Sooooo...today I finally got around to doing something with 6080 again! I finally installed my black side stripe kit I got from Video Bob almost three years ago!!! It wasn't too hard to install, and only took a couple of hours counting my lunch break in the middle! It looks awesome!!!!

Before
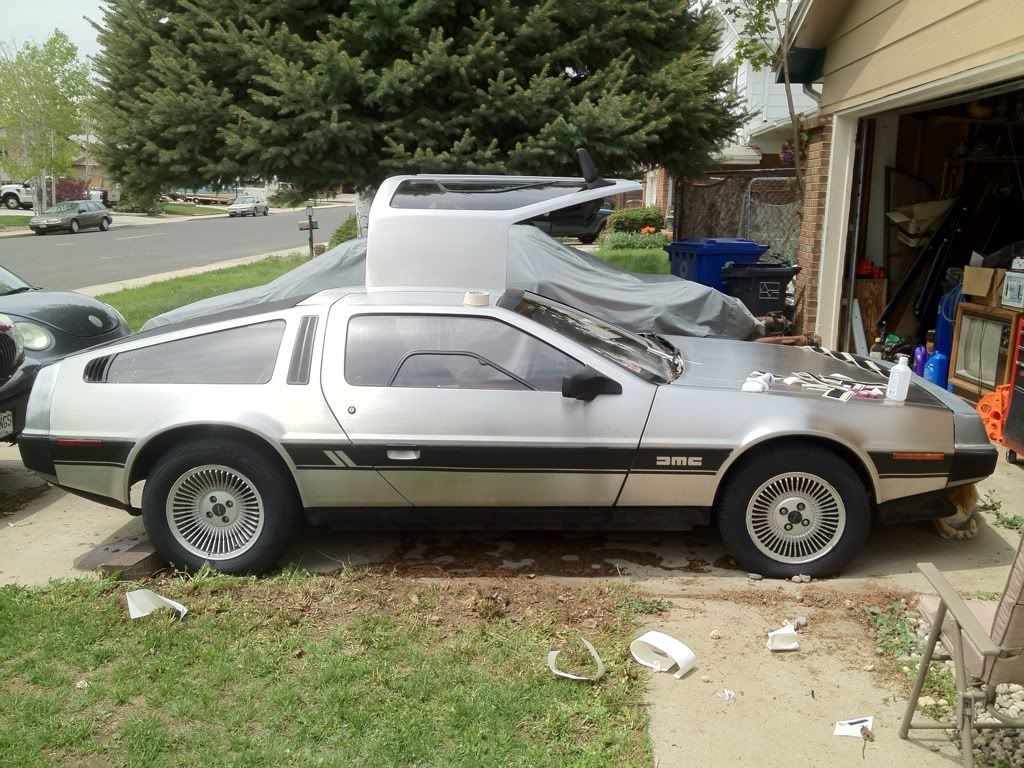
After! Much improved! :D
So next up on the list is locating the leak in the clutch and repairing it, painting the wheels the dark grey color, and FINALLY replacing the A/C system! Looking forward to getting back into these projects!!
~Lyndsey
Wednesday, February 9, 2011
New problem & snowstorm
I know I haven't posted anything recently, but since winter hit, I've only driven my DeLorean 3 times so there really hasn't been much to post. I do have a little bit of an update, so I figured I'd go ahead and make a new post.
So the last time I drove my DeLorean before switching to my winter car, I noticed that there was something leaking out from under the car. I couldn't tell what it was in the parking lot, so I drove the car home, parked it and honestly forgot about the leak. Two months later, I decided to drive it on a nice day. I get in, push in the clutch, and it goes to the floor with no resistance! I check the fluid, and it was completely dry! I ended up filling it back up, pumped the clutch a few times and it was back to normal. I drove it almost 100 miles throughout the day, and no problems. I parked it again, and didn't drive it again for over a month. So I decided to drive it again a few days ago. First thing I did was check the fluid. It was still full! So I drove it about 140 miles that day, and still no problem, still full. I don't know what happened, but the leak seems to have stopped for now. I am still going to end up tracking down the source of the leak once the weather clears up, so yet another item to add to my to-do list.
Me being the procrastinator that I am, I let the registration on my other car expire. >:( So I had to drive my D to see my girlfriend this weekend, 65 miles away. I knew there was a snowstorm on the way, but it wasn't supposed to start snowing until midnight. Well, since when can weathermen predict the weather, let alone the future? It started snowing about 7:30. As soon as it did, I jumped in my car and took off toward home. Before I even made it halfway, I was in the middle of a terrible snowstorm! Going down I-25, all the cars on the road were going 20 MPH, and you could barely see one car length ahead of you! I have never driven my DeLorean in snow before because I had heard how bad they handle when it's slick. I made it home without incident, but I did slide around quite a bit whenever I had to turn. Hopefully I am never in a situation where I have to drive it in those conditions again, but it wasn't as bad as I thought it would be. Plus, the heater works pretty well with the new fan, so I was nice and warm the whole time! :) Also, halfway through the storm, my car passed 52,000 miles! Yay!!
Another thing I have to add to my to-do list is change out the shocks and rear springs. I got a set of used but still good shocks from another DeLorean owner who upgraded to the high performance type, so sometime this spring/summer I will change out the shocks, and while I'm at it I'll finally install the rear springs that I've had waiting for 4 years!
Sorry I don't have any new pictures to share. Hopefully I'll be able to get to a car wash this weekend and take some new pictures! For now, here's the "Gear Head" video that Josh from DPI made at our tech session. My car is featured quite a bit, and I actually did some of the camera work. Enjoy!
~Lyndsey
Tuesday, October 5, 2010
Long Overdue Update!
Wow, I got busy, and now I am a month behind on this blog! Where does the time go? I can't believe it's October already!! Anyway, A LOT has happened over the last month, so I am thinking I will divide this post up into sections. Hope it isn't too hard to follow! :)
Part 1: The Interior
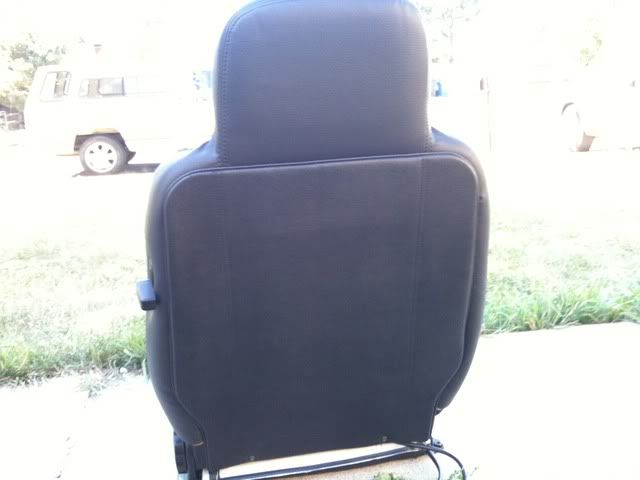
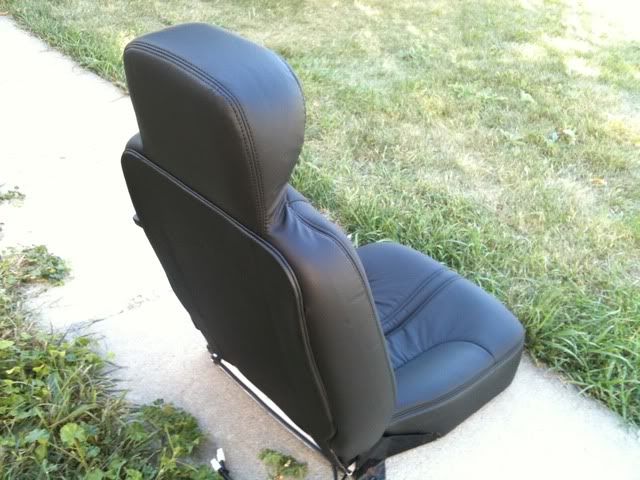
Let's see, where did I leave off? Wow, okay. So I got both seats recovered! I'm guessing it took about 4 hours total, and I think they turned out awesome! Though I will be perfectly honest that if I ever have to do a pair of seats again, I will probably just pay someone else to do it. It would be worth the money in my opinion. After playing my seats' favorite game of "How many times can we possibly break the same fingernails?", and quite a few swear words later, I was done, and I now hate hog rings with a passion! But at least now I have beautifully recovered seats with seat heaters!!! I also finished up dying the rest of the interior, and mostly finished installing the carpets.
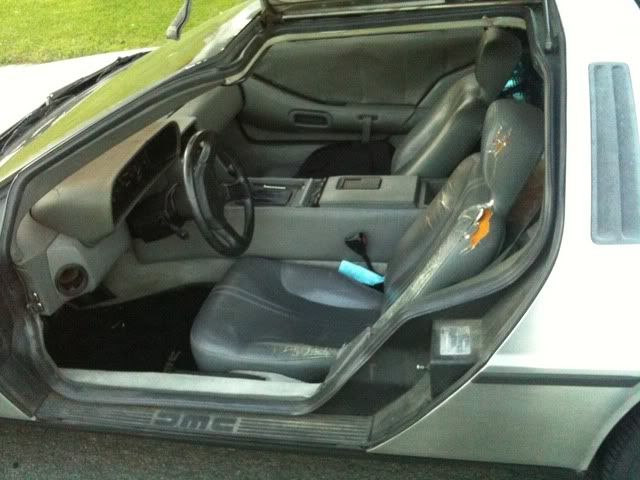
A before shot showing the general condition of the interior.
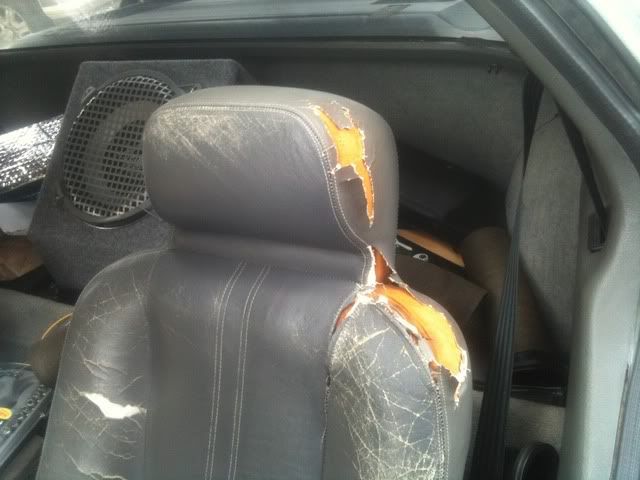
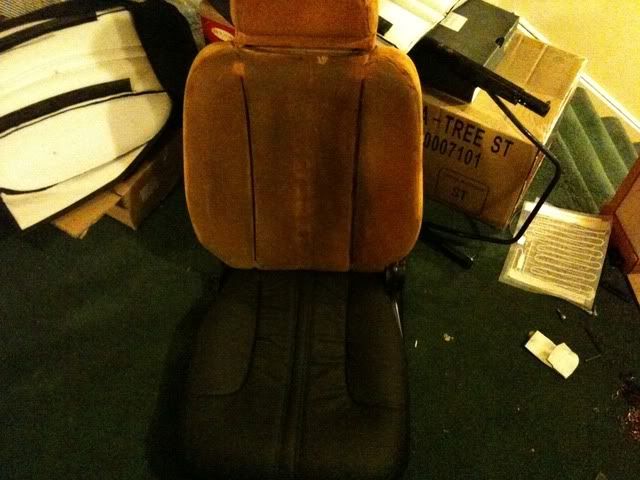
Before shot of the seat.
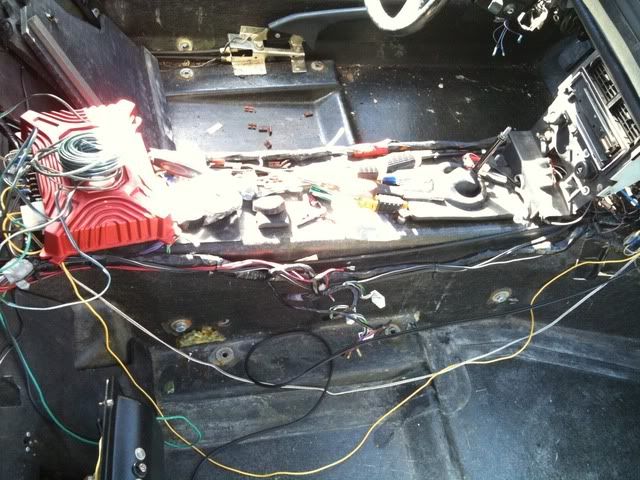
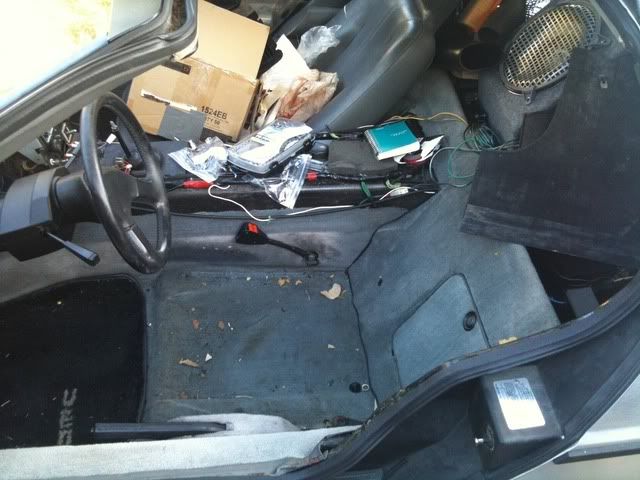
All interior removed.
The old carpet out, the new carpet ready to go in!
During the recover.
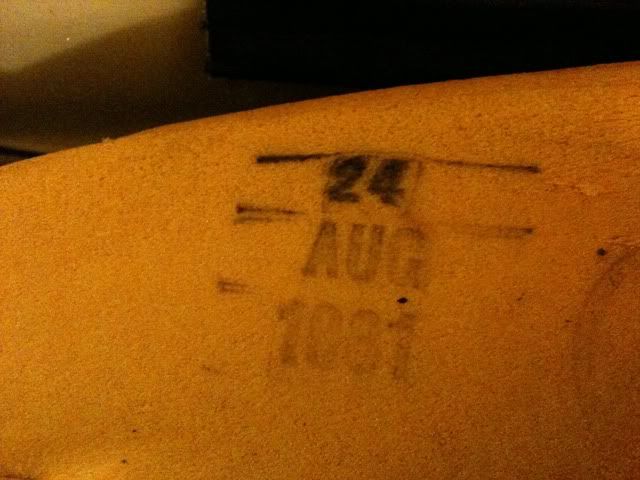
I found this on my passenger seat!
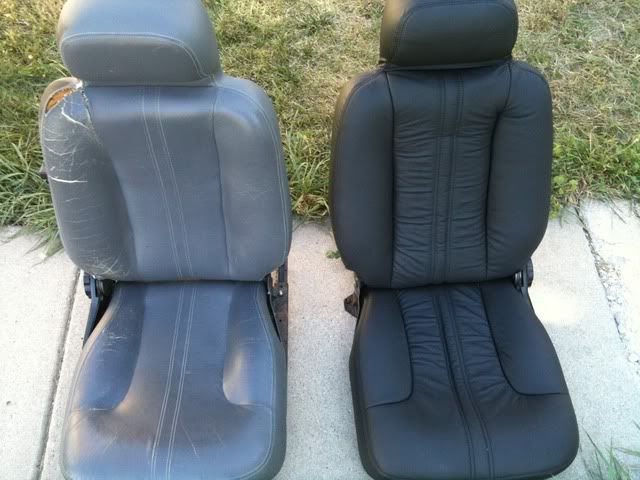
The old passenger seat with the newly redone driver seat.
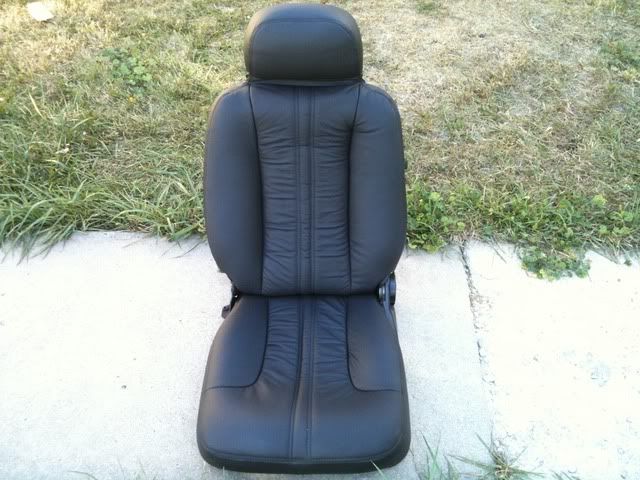
Very nice!
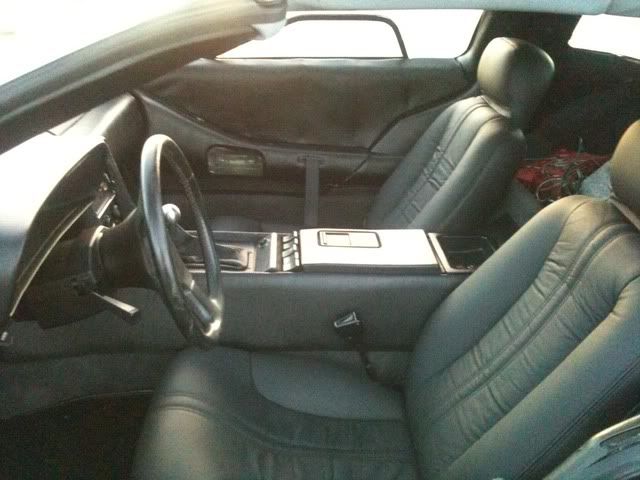
The 95% done shots.
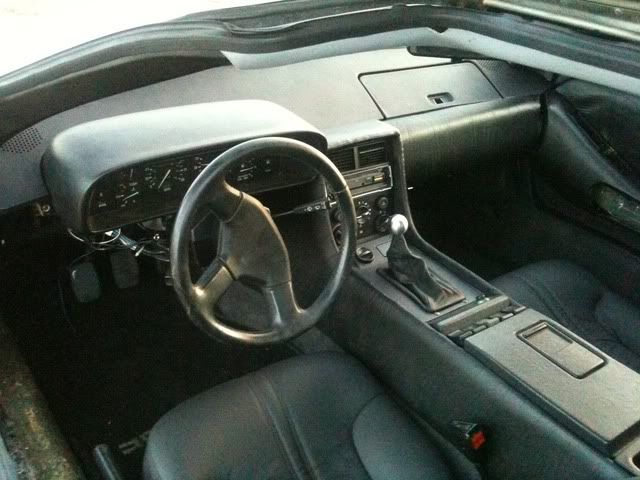
I'll let you figure out what still needs to be done in these pictures.
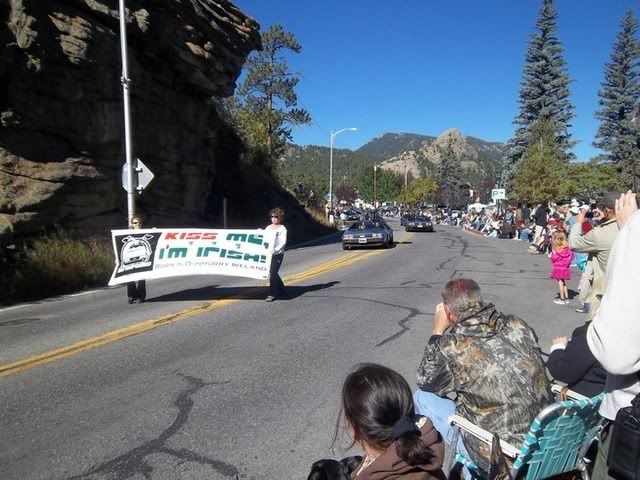
Not surprisingly, this interior project took much longer to finish than I had originally thought. I ended up working for 24 hours straight to finish up in time to make it to the Scottish Irish Highland Festival in Estes Park. Actually I never did fully finish. I am guessing I'm about 95% done at this point. I worked up until 6am the morning of the parade, drove home, took a shower, drove straight up to Estes Park, and made it right on time to meet the group for the parade!
Part 2: The Highland Festival
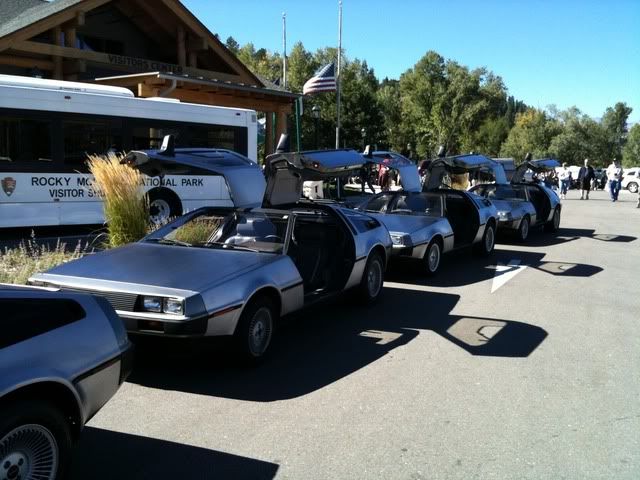
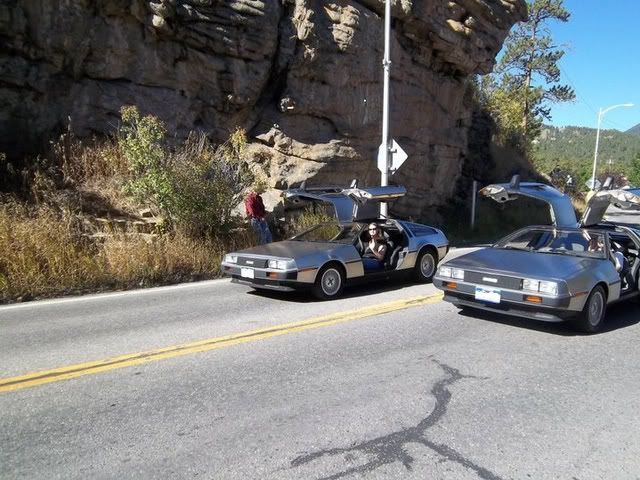
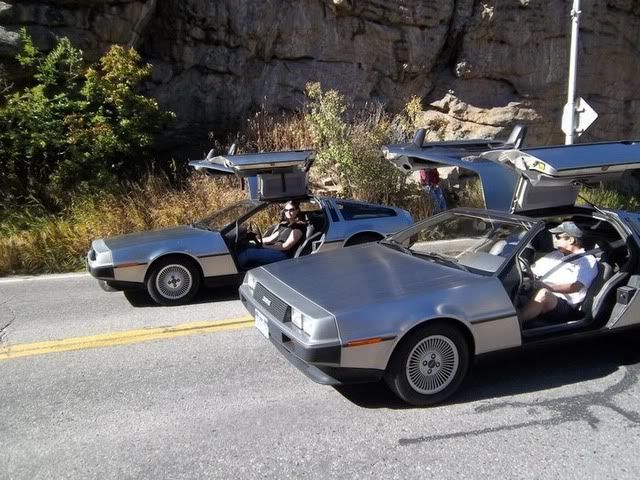
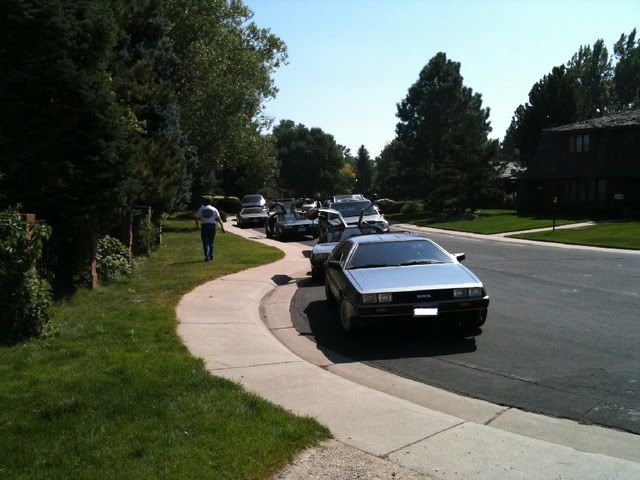
So on my way home to clean up before heading to Estes Park, I noticed the dash lights weren't working. :( "Must not have hooked something up right" I thought. Since I didn't have time to worry about it, I didn't think any more of it. The binnacle wasn't mounted securely because the studs on the bottom of the used binnacle were a different size than the ones on my old binnacle. Oh well, just one of those things that I didn't have time for. I also didn't get the glove box lid, door pull handles, some of the carpets, mirror switch and a few other misc. parts installed, but it was complete for the most part. Good enough for a parade anyhow! So I drive up there, and on my way my car passed 50,000 miles! So I get there, meet up with the local DeLorean group, and we drive in the parade. That was really fun! We had 7 DeLoreans total. After the parade, we were allowed to park right inside the main entrance to the festival, so we got a lot of attention. Everybody seemed to love the cars! This was the first time I had ever shown my DeLorean, so it was a really neat experience for me. The look on people's faces as they sat in the cars was awesome.
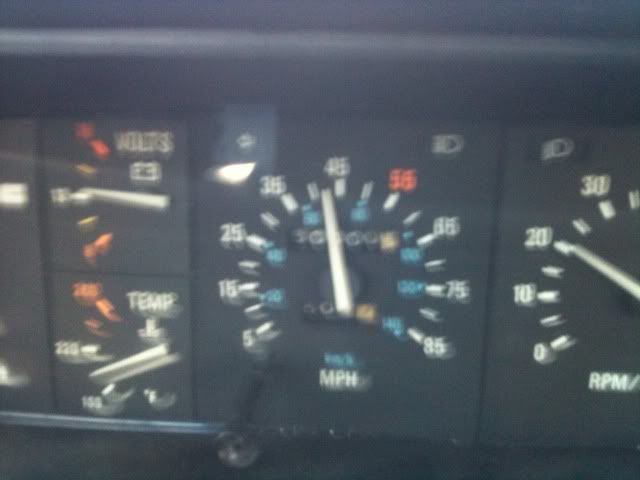
I was driving to the parade when I passed 50,000 miles. Unfortunately, this was the best picture I got because I couldn't really pull over at the time.
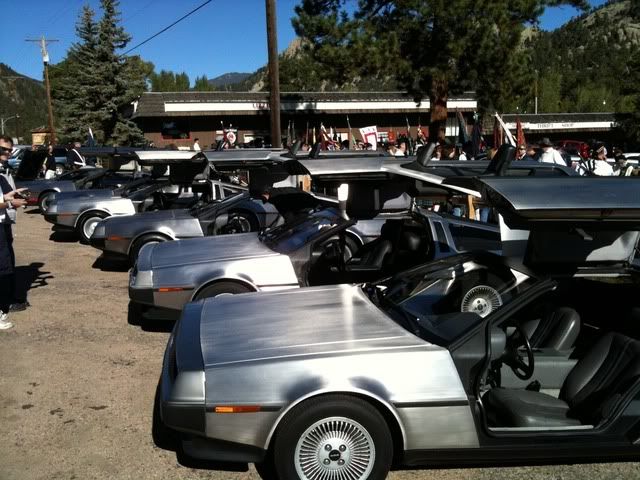
A beautiful sight!
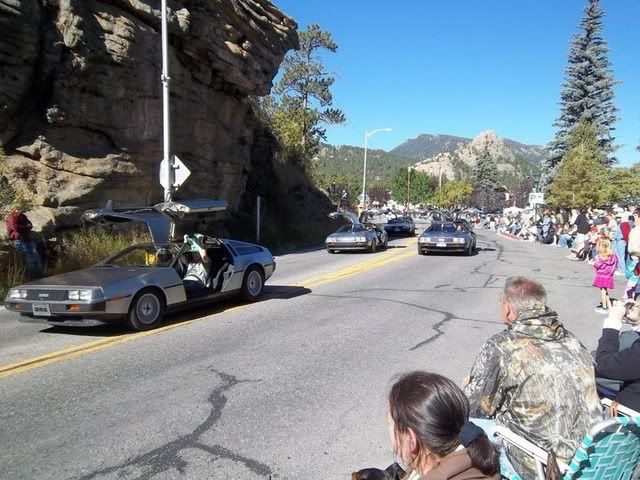
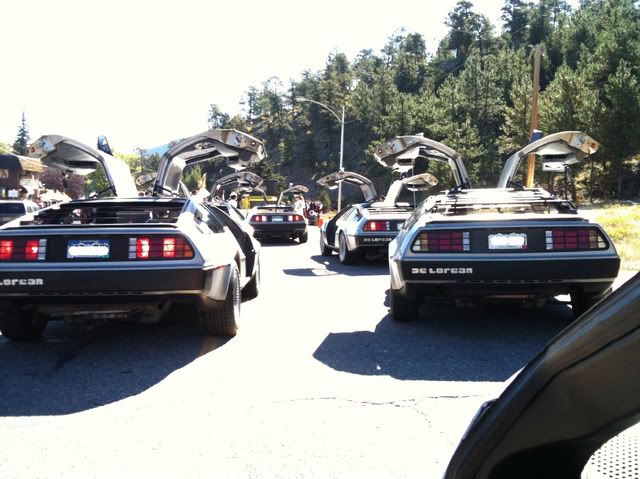
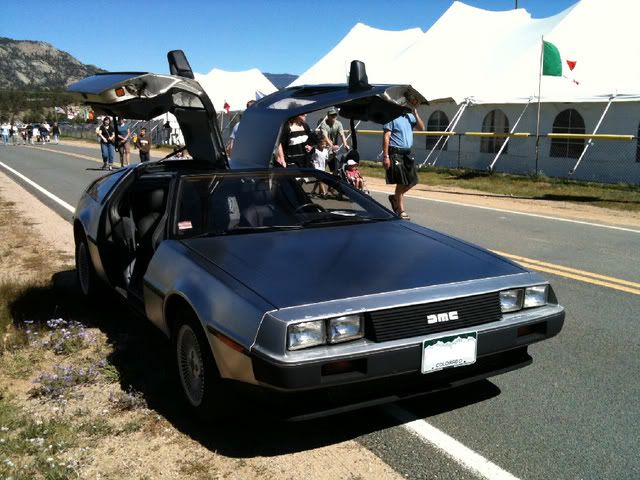
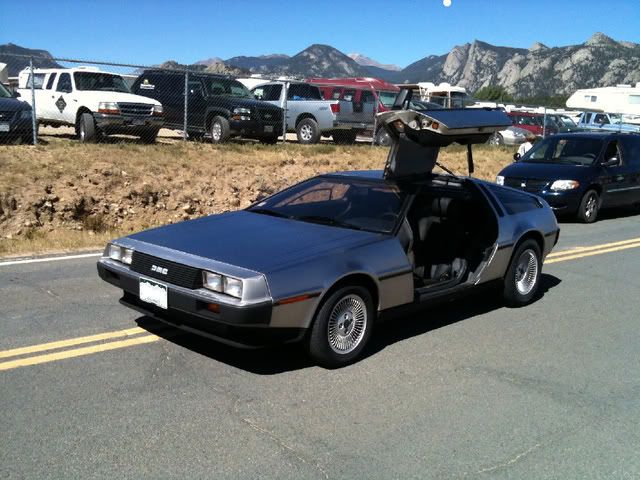
My new favorite picture of my car.
So after the festival and dinner, I realized that my dash lights still weren't working, and that it was getting dark. I really didn't want to have to drive back down the canyon at night not know how fast I was going. Turned out that my passenger side driving lights weren't working either. So another group member helped me figure out that I had two blown fuses. We replaced them, and they blew again. So we replaced them again, and they seemed to work. We parted ways, and I started on my way home. As soon as I pulled out on the main road, the fuses blew again! Grrr. So I pulled into a parking lot and called someone to meet me. I wanted him to follow me home, so I wouldn't get pulled over for having some driving lights out. I ended up using an app on my phone to see how fast I was going the whole way home, since I couldn't see any of the gauges. I also hadn't slept in almost 40 hours at this point, so I was trying desperately not to fall asleep the whole way. But I made it home okay, and absolutely passed out. When I woke up the next day, I realized how badly I had gotten sunburned. Ouch! But it really was a fun experience! A few days later I finally figured out what was causing the fuses to blow. I figured out that they only blew when the clock/shifter panel was attached. After a bit of trial and error (and 14 fuses later), I found that the power wire for the lighted ring around the cigarette lighter had come off and was shorting when the clock/shifter panel was tightened down. Re-attached that, and everything has been working fine since! (I now carry plenty of extra fuses just in case.)
Part 3: The Tech Session
The day after the Highland Festival, I drove my DeLorean to work as I always do. I noticed that the speedometer was bouncing so badly that I couldn't even tell how fast I was going! I knew we were going to have a tech session the following weekend, so I ordered a new angle drive from DMCH so that we could install it. I thought this tech session might also be a good time to change out my trailing arm bolts (TABs). They are a common problem on DeLoreans, and I had already been told by the local DeLorean mechanic that mine really needed to be replaced. I bought a set of Toby TABs when I first bought my car back in 2006, but had never had the chance to install them.
We had 7 DeLoreans show up to the Tech Session, plus a parts car that one member had just gotten out of a junkyard in Colorado Springs. It had been destroyed in an accident and left sitting in the junkyard for 12 years exposed to the elements, but ended up having a lot of good usable parts.
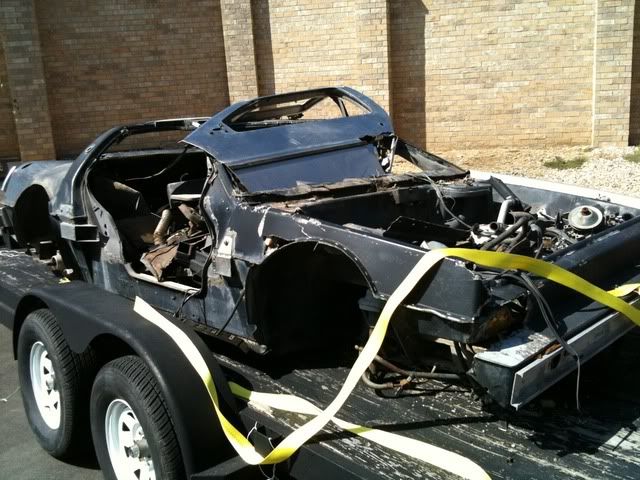
So sad. :(
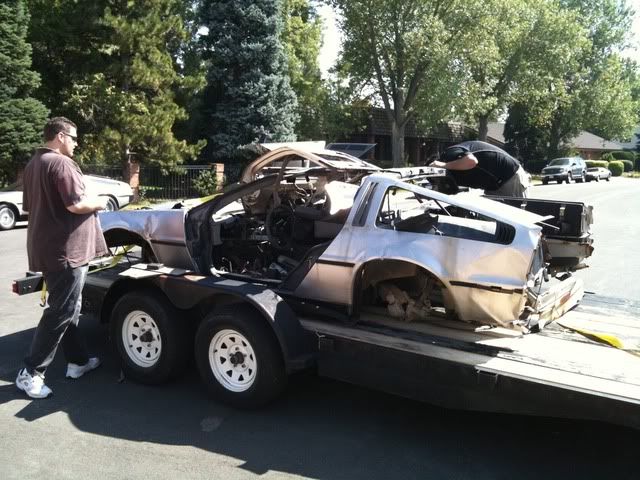
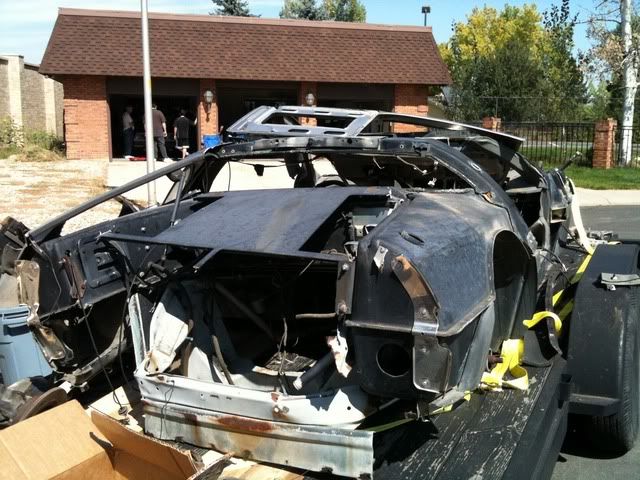
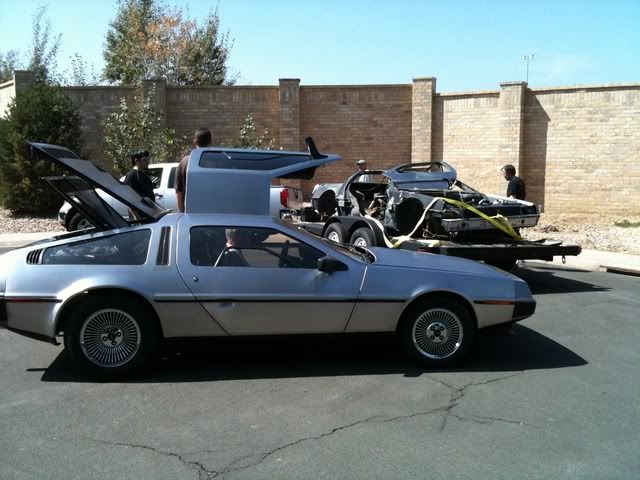

Poor car. :( RIP.
Our guest for the Tech Session was Josh from DeLorean Performance Industries. He was offering technical advice and was performing inspections on the cars. During his inspection on my car, he asked "How far do you have to drive this home?". I guess the trailing arm bolts were badly bent and ready to snap at any time! I had already decided I wasn't going to attempt the TABs that day because it had the potential to turn into a really big project and I didn't want to take up the whole session with my car. Well, that changed when he told me I shouldn't even drive the car again until they had been changed! A few group members jumped in and started work on replacing the TABs. It should have been a one hour project on most cars, but every project on this car seems to turn into a major project, and this was no exception. First, the old TABs wouldn't come out because they were too bent. Turned out nobody had anything to cut them with, so we waited until the next day. Cut out the old bolts, but still couldn't get them out of the trailing arm! So it was decided to remove the entire trailing arm to get them out. In the process, the brake line bracket on my passenger side TA tore off because it was so rusty! Luckily, the parts car had a good one! So we replaced that, then couldn't get the old brake hoses out. Then the hoses I had to replace them with were the wrong size. Then the steel brake lines broke. Then we found out that the driver side caliper was seized. I ended up having to order $200 worth of replacement parts. So after a week had passed, we FINALLY got my car back on the road, and I have been driving it since. Josh told me that my frame was pretty bad from rust and that I was going to have to replace it, but that it should be okay to drive for a while. So I guess I need to add frame replacement to my to-do list. :( Oh well, at least now I have Toby TABs installed, so I can finally quit worrying about those, and I also have rebuilt rear brakes with new lines and hoses, and a new angle drive! Yay!!
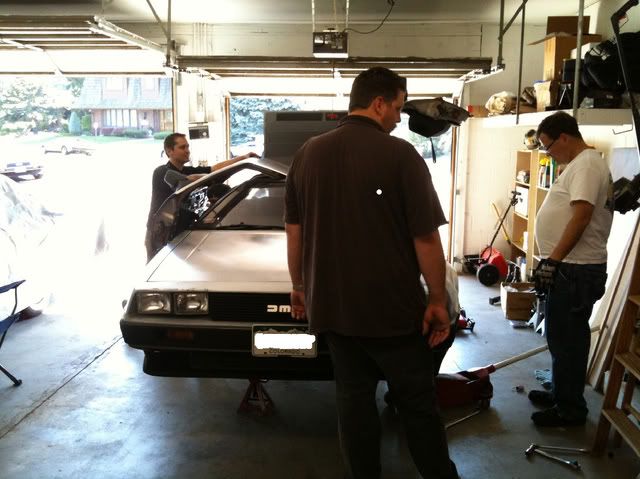
My car as work began.
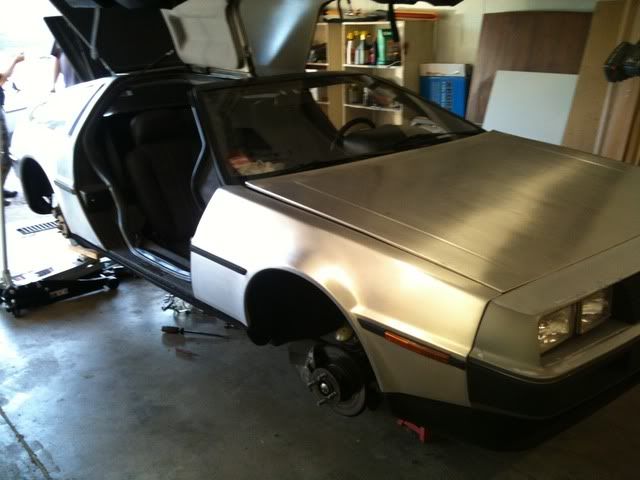
Up on jack stands.

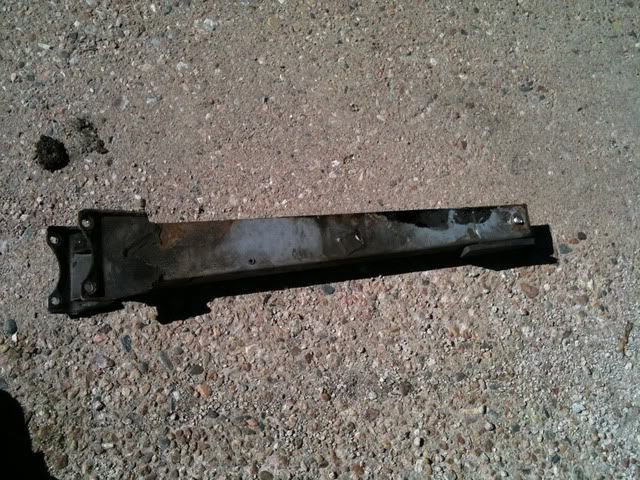
The old, rusty trailing arm.
I really need to rebuild the rear suspension! Yuck! I hate rust!
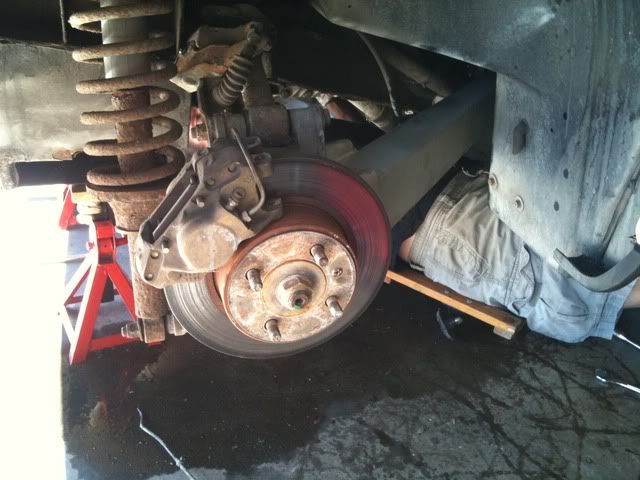
Removing the trailing arm from the parts car to replace my rusted one.
So the next projects in the coming weeks will be to replace the entire A/C system...just in time for winter. Oh well, at least it will be ready for next year! Also a couple of minor projects like installing the black side stripe and cleaning up all of the grounds, and hopefully replacing the weather stripping around the doors so my new interior doesn't get messed up this winter (I don't have a garage to store the car in). Anyway, I will keep this blog more up to date from now on. It sucks trying to catch up on a month of updates all at once!
~Lyndsey
Happy 50,000 miles, 6080!!!

Part 1: The Interior
Let's see, where did I leave off? Wow, okay. So I got both seats recovered! I'm guessing it took about 4 hours total, and I think they turned out awesome! Though I will be perfectly honest that if I ever have to do a pair of seats again, I will probably just pay someone else to do it. It would be worth the money in my opinion. After playing my seats' favorite game of "How many times can we possibly break the same fingernails?", and quite a few swear words later, I was done, and I now hate hog rings with a passion! But at least now I have beautifully recovered seats with seat heaters!!! I also finished up dying the rest of the interior, and mostly finished installing the carpets.

A before shot showing the general condition of the interior.

Before shot of the seat.

All interior removed.

The old carpet out, the new carpet ready to go in!

During the recover.

I found this on my passenger seat!

The old passenger seat with the newly redone driver seat.

Very nice!


The 95% done shots.

I'll let you figure out what still needs to be done in these pictures.
Not surprisingly, this interior project took much longer to finish than I had originally thought. I ended up working for 24 hours straight to finish up in time to make it to the Scottish Irish Highland Festival in Estes Park. Actually I never did fully finish. I am guessing I'm about 95% done at this point. I worked up until 6am the morning of the parade, drove home, took a shower, drove straight up to Estes Park, and made it right on time to meet the group for the parade!
Part 2: The Highland Festival
So on my way home to clean up before heading to Estes Park, I noticed the dash lights weren't working. :( "Must not have hooked something up right" I thought. Since I didn't have time to worry about it, I didn't think any more of it. The binnacle wasn't mounted securely because the studs on the bottom of the used binnacle were a different size than the ones on my old binnacle. Oh well, just one of those things that I didn't have time for. I also didn't get the glove box lid, door pull handles, some of the carpets, mirror switch and a few other misc. parts installed, but it was complete for the most part. Good enough for a parade anyhow! So I drive up there, and on my way my car passed 50,000 miles! So I get there, meet up with the local DeLorean group, and we drive in the parade. That was really fun! We had 7 DeLoreans total. After the parade, we were allowed to park right inside the main entrance to the festival, so we got a lot of attention. Everybody seemed to love the cars! This was the first time I had ever shown my DeLorean, so it was a really neat experience for me. The look on people's faces as they sat in the cars was awesome.

I was driving to the parade when I passed 50,000 miles. Unfortunately, this was the best picture I got because I couldn't really pull over at the time.

A beautiful sight!


My new favorite picture of my car.
So after the festival and dinner, I realized that my dash lights still weren't working, and that it was getting dark. I really didn't want to have to drive back down the canyon at night not know how fast I was going. Turned out that my passenger side driving lights weren't working either. So another group member helped me figure out that I had two blown fuses. We replaced them, and they blew again. So we replaced them again, and they seemed to work. We parted ways, and I started on my way home. As soon as I pulled out on the main road, the fuses blew again! Grrr. So I pulled into a parking lot and called someone to meet me. I wanted him to follow me home, so I wouldn't get pulled over for having some driving lights out. I ended up using an app on my phone to see how fast I was going the whole way home, since I couldn't see any of the gauges. I also hadn't slept in almost 40 hours at this point, so I was trying desperately not to fall asleep the whole way. But I made it home okay, and absolutely passed out. When I woke up the next day, I realized how badly I had gotten sunburned. Ouch! But it really was a fun experience! A few days later I finally figured out what was causing the fuses to blow. I figured out that they only blew when the clock/shifter panel was attached. After a bit of trial and error (and 14 fuses later), I found that the power wire for the lighted ring around the cigarette lighter had come off and was shorting when the clock/shifter panel was tightened down. Re-attached that, and everything has been working fine since! (I now carry plenty of extra fuses just in case.)
Part 3: The Tech Session
The day after the Highland Festival, I drove my DeLorean to work as I always do. I noticed that the speedometer was bouncing so badly that I couldn't even tell how fast I was going! I knew we were going to have a tech session the following weekend, so I ordered a new angle drive from DMCH so that we could install it. I thought this tech session might also be a good time to change out my trailing arm bolts (TABs). They are a common problem on DeLoreans, and I had already been told by the local DeLorean mechanic that mine really needed to be replaced. I bought a set of Toby TABs when I first bought my car back in 2006, but had never had the chance to install them.
We had 7 DeLoreans show up to the Tech Session, plus a parts car that one member had just gotten out of a junkyard in Colorado Springs. It had been destroyed in an accident and left sitting in the junkyard for 12 years exposed to the elements, but ended up having a lot of good usable parts.


So sad. :(


Poor car. :( RIP.
Our guest for the Tech Session was Josh from DeLorean Performance Industries. He was offering technical advice and was performing inspections on the cars. During his inspection on my car, he asked "How far do you have to drive this home?". I guess the trailing arm bolts were badly bent and ready to snap at any time! I had already decided I wasn't going to attempt the TABs that day because it had the potential to turn into a really big project and I didn't want to take up the whole session with my car. Well, that changed when he told me I shouldn't even drive the car again until they had been changed! A few group members jumped in and started work on replacing the TABs. It should have been a one hour project on most cars, but every project on this car seems to turn into a major project, and this was no exception. First, the old TABs wouldn't come out because they were too bent. Turned out nobody had anything to cut them with, so we waited until the next day. Cut out the old bolts, but still couldn't get them out of the trailing arm! So it was decided to remove the entire trailing arm to get them out. In the process, the brake line bracket on my passenger side TA tore off because it was so rusty! Luckily, the parts car had a good one! So we replaced that, then couldn't get the old brake hoses out. Then the hoses I had to replace them with were the wrong size. Then the steel brake lines broke. Then we found out that the driver side caliper was seized. I ended up having to order $200 worth of replacement parts. So after a week had passed, we FINALLY got my car back on the road, and I have been driving it since. Josh told me that my frame was pretty bad from rust and that I was going to have to replace it, but that it should be okay to drive for a while. So I guess I need to add frame replacement to my to-do list. :( Oh well, at least now I have Toby TABs installed, so I can finally quit worrying about those, and I also have rebuilt rear brakes with new lines and hoses, and a new angle drive! Yay!!

My car as work began.

Up on jack stands.


The old, rusty trailing arm.

I really need to rebuild the rear suspension! Yuck! I hate rust!
Removing the trailing arm from the parts car to replace my rusted one.
So the next projects in the coming weeks will be to replace the entire A/C system...just in time for winter. Oh well, at least it will be ready for next year! Also a couple of minor projects like installing the black side stripe and cleaning up all of the grounds, and hopefully replacing the weather stripping around the doors so my new interior doesn't get messed up this winter (I don't have a garage to store the car in). Anyway, I will keep this blog more up to date from now on. It sucks trying to catch up on a month of updates all at once!
~Lyndsey
Happy 50,000 miles, 6080!!!

Saturday, September 4, 2010
Day 3
Day three was almost as productive as day two was (so far, not done yet!). So far I have gotten the lower door panels and door handles dyed, door pillar trim dyed, door headliners out, driver side quarter panel and seats out, and am getting ready to start recovering the seats as soon as I am done writing this post. All I have left is to get the passenger side quarter panel out, and get the rear panel out and dye it and the quarter panels. Should be about an hour or less, then I will be ready to start putting things back in. I will probably do the carpet first, then the seats, then quarter panels, then door panels & trim, then dash/console/knee pads, then headliner. I'm hoping that it will only take a few hours tomorrow before I'm done. That may be a bit optimistic, but I am fully planning to be done before the day ends tomorrow! That is of course assuming that I can get the seats both recovered tonight. I guess time will tell. I should at the very least be MOSTLY done tomorrow.
My re-dyed door panel with the reproduction DMCH door pulls. The color is PERFECT!
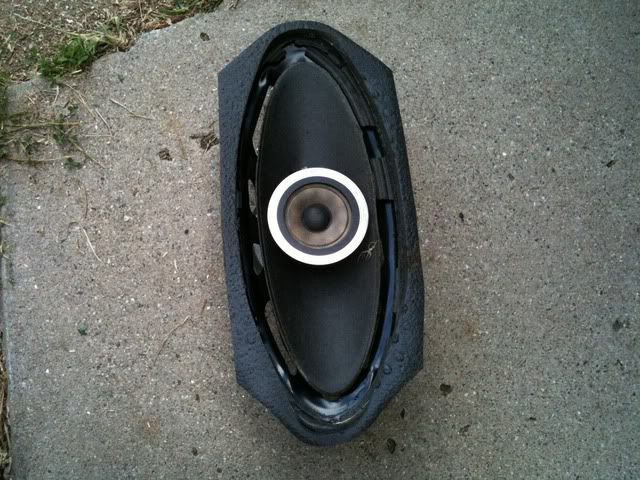
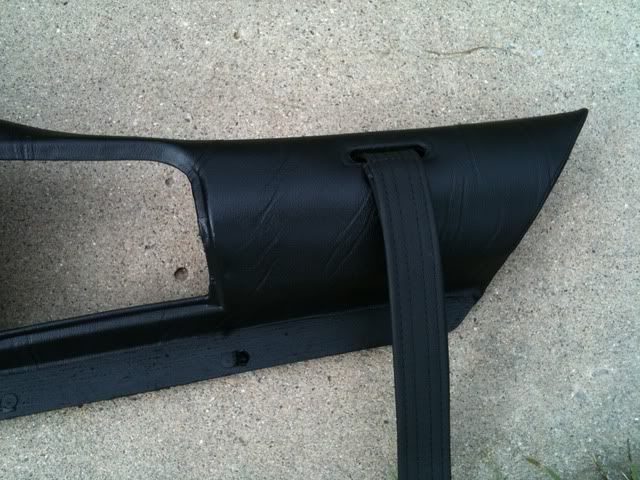
Wow, it's no wonder these speakers sounded like SHIT! You can see the ground through them, and chunks fell off when I took it out!!!
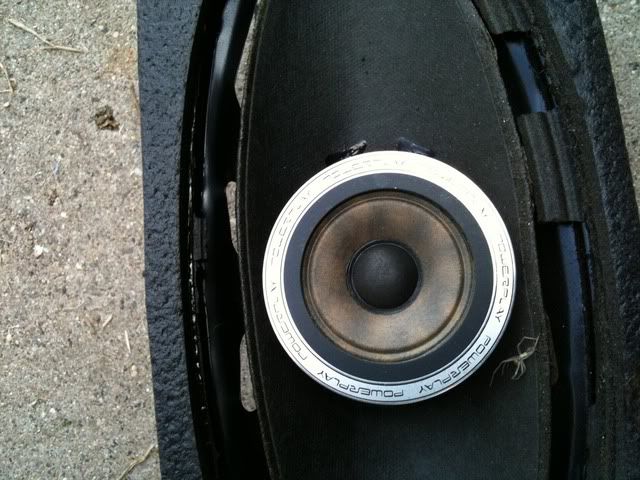
It came complete with a dead spider!
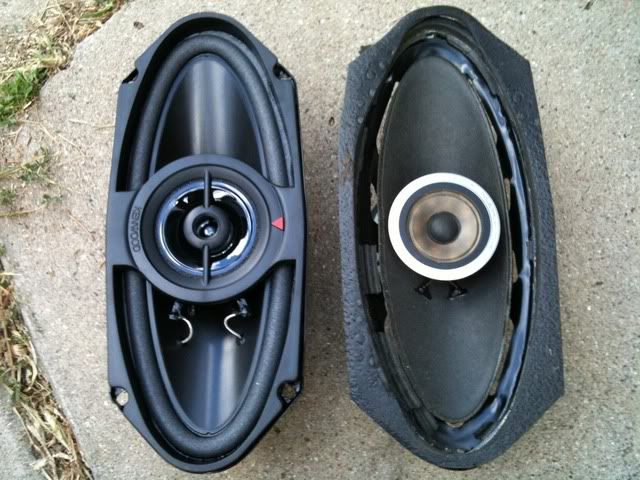
I'm guessing these will sound just a little bit better, LOL!
Seat is out. Much easier to take out than I thought it would be.
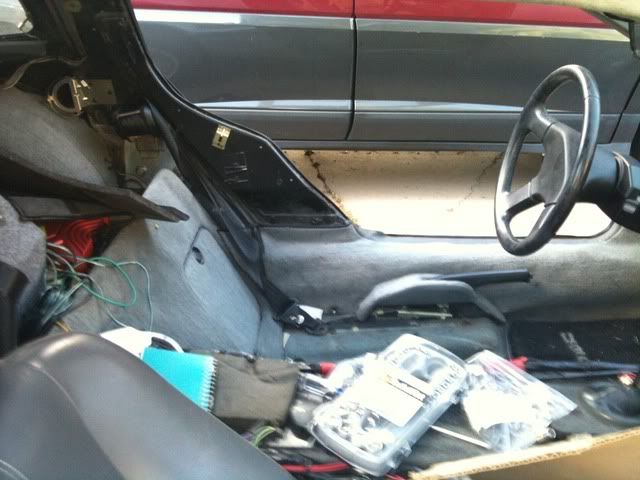
No seat or quarter panel.
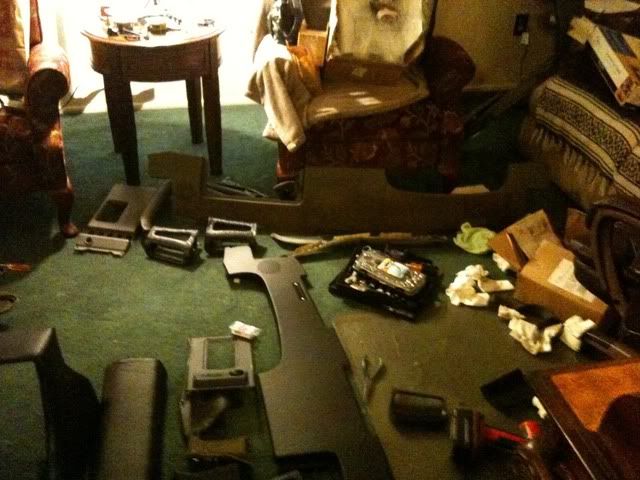
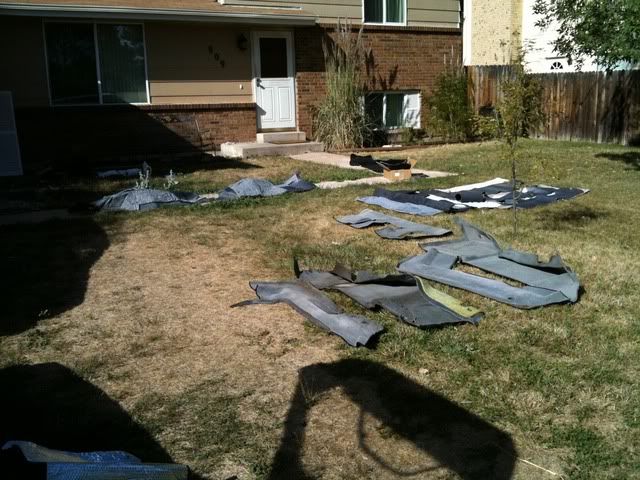
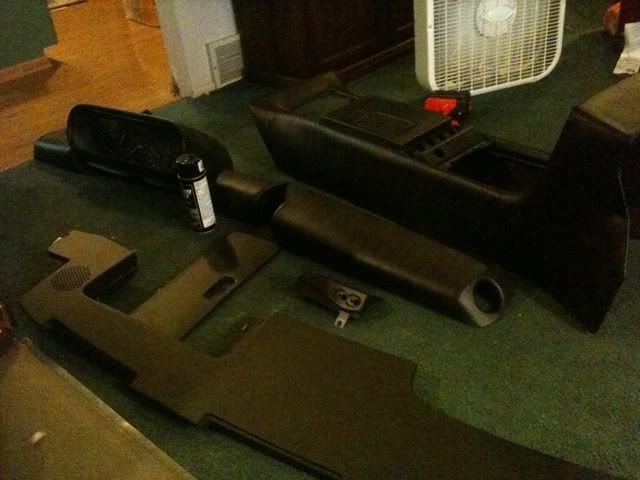
Just to give you an idea of the scope of this project. Everything you see is part of this project.
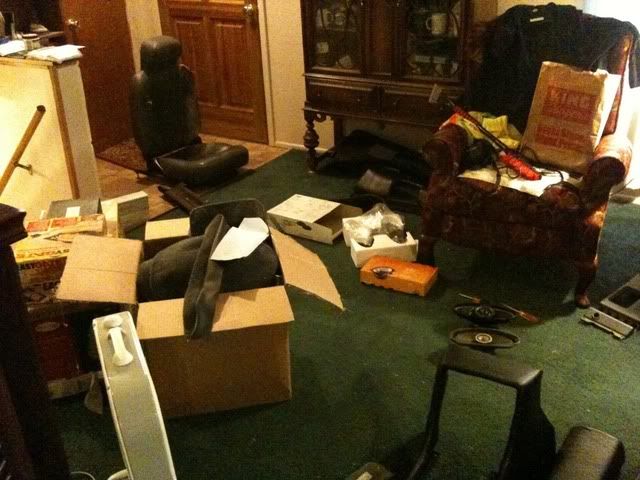
My parents are gone this week, so I kind of took over their living room!! I wouldn't have had enough space at my place for everything, so it worked out perfectly! :) I have even added more stuff since this picture!

My re-dyed door panel with the reproduction DMCH door pulls. The color is PERFECT!

Wow, it's no wonder these speakers sounded like SHIT! You can see the ground through them, and chunks fell off when I took it out!!!

It came complete with a dead spider!

I'm guessing these will sound just a little bit better, LOL!

Seat is out. Much easier to take out than I thought it would be.

No seat or quarter panel.

Just to give you an idea of the scope of this project. Everything you see is part of this project.

My parents are gone this week, so I kind of took over their living room!! I wouldn't have had enough space at my place for everything, so it worked out perfectly! :) I have even added more stuff since this picture!
Friday, September 3, 2010
Day 2
I finally got my knee pads, center console and upper door panels dyed black today, and they turned out even better than I was hoping for! They look awesome, and they match perfectly with the factory black parts!
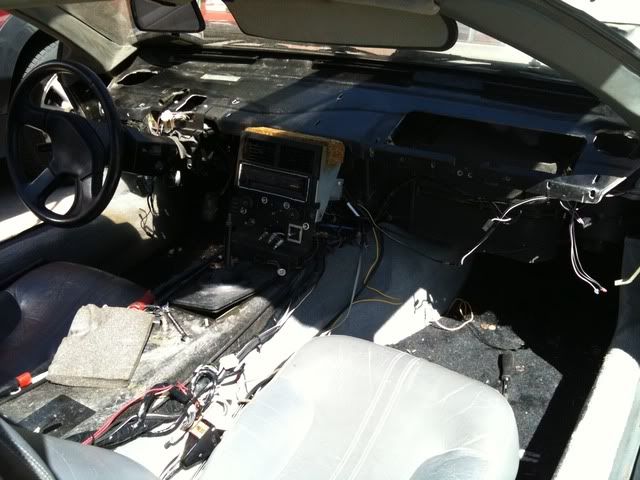
How the interior looks at the moment!
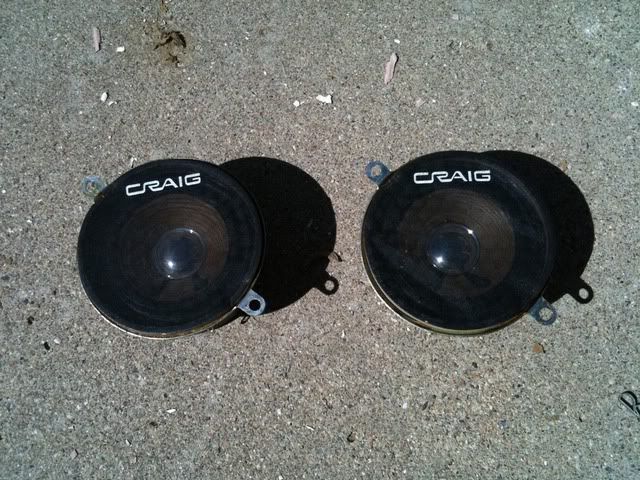
The factory Craig speakers from the dash. They still work, too!
The first pieces waiting to be dyed.
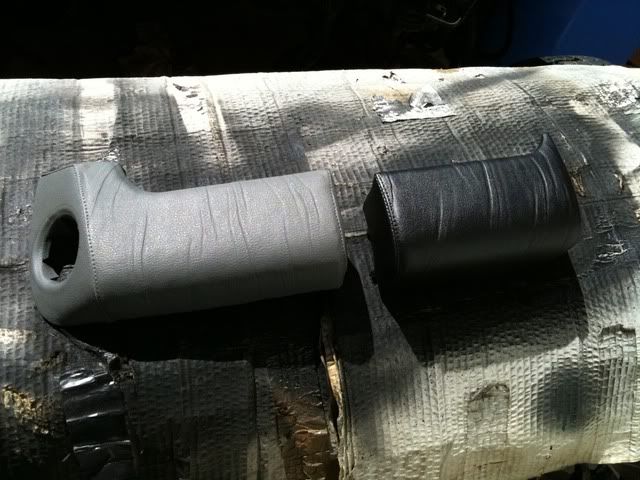
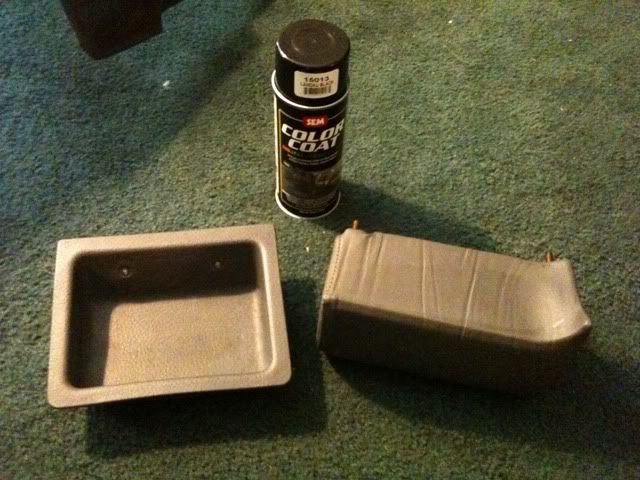
Before and after on the knee pads.
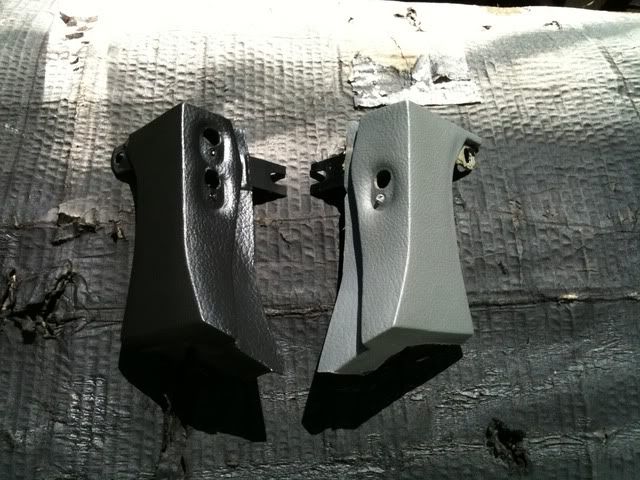
Another before and after example.
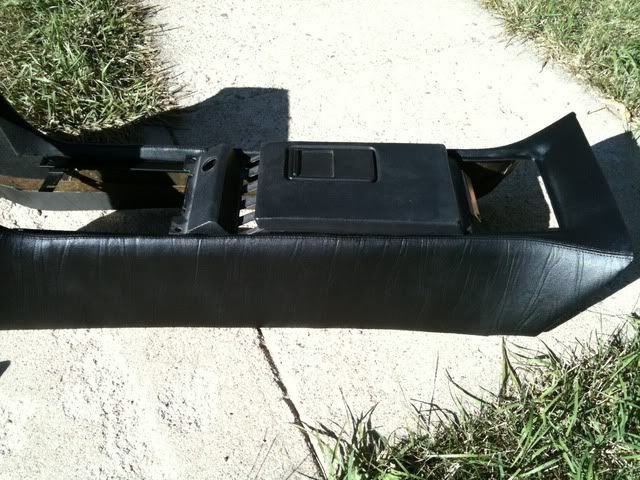
My re-dyed center console with factory black arm rest. They match perfectly in person!
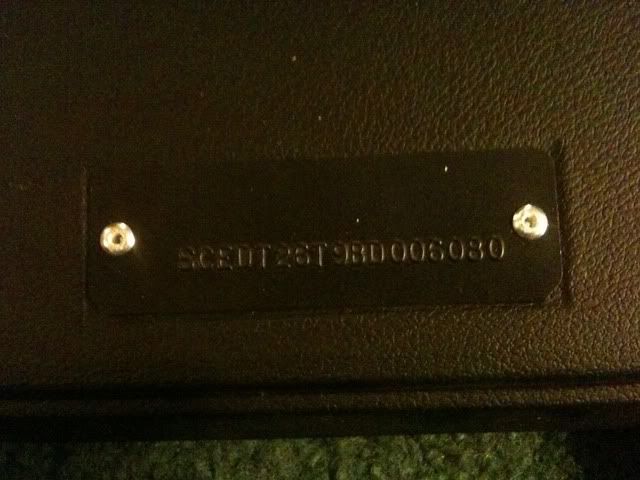
My VIN plate painted and installed on my new DMCH dash!
The steadily growing pile of parts to be installed. Without knowing, could you tell which ones are original factory parts, reproductions or re-dyed? I can't!
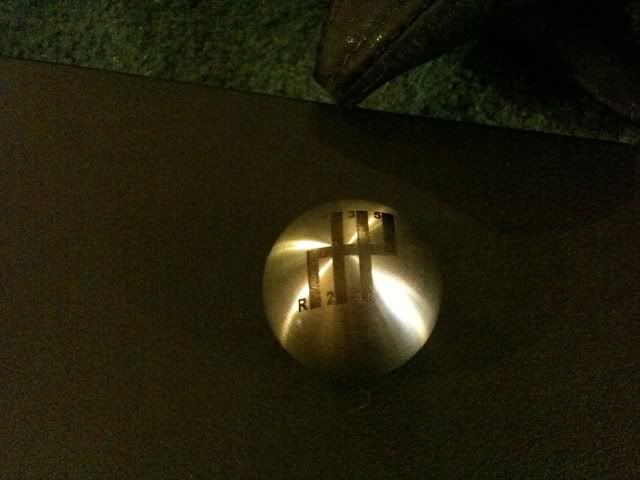
My new shifter ball. It's brushed stainless and looks AWESOME!
Tomorrow I am going to dye the few remaining parts, and get everything installed! I also have a new mini-project I'm starting. Since I am installing seat warmers, I am trying to figure out how to modify some factory window switches to act as the hi/lo temp on/off switches for them. It shouldn't be too hard. Unfortunately I can't just use the dummy switches, since then it would just be on/off and you couldn't choose the temp setting. I just got my used switches in the mail yesterday, so I will start looking into that tomorrow.
I have more pictures, but somehow I forgot my camera AGAIN, so I'll post some more pictures tonight.

How the interior looks at the moment!

The factory Craig speakers from the dash. They still work, too!

The first pieces waiting to be dyed.

Before and after on the knee pads.

Another before and after example.

My re-dyed center console with factory black arm rest. They match perfectly in person!

My VIN plate painted and installed on my new DMCH dash!

The steadily growing pile of parts to be installed. Without knowing, could you tell which ones are original factory parts, reproductions or re-dyed? I can't!

My new shifter ball. It's brushed stainless and looks AWESOME!
Tomorrow I am going to dye the few remaining parts, and get everything installed! I also have a new mini-project I'm starting. Since I am installing seat warmers, I am trying to figure out how to modify some factory window switches to act as the hi/lo temp on/off switches for them. It shouldn't be too hard. Unfortunately I can't just use the dummy switches, since then it would just be on/off and you couldn't choose the temp setting. I just got my used switches in the mail yesterday, so I will start looking into that tomorrow.
I have more pictures, but somehow I forgot my camera AGAIN, so I'll post some more pictures tonight.
Subscribe to:
Posts (Atom)
